Rigging a Fishing Kayak: Tracks, Mounts, Wiring and Sounder Install
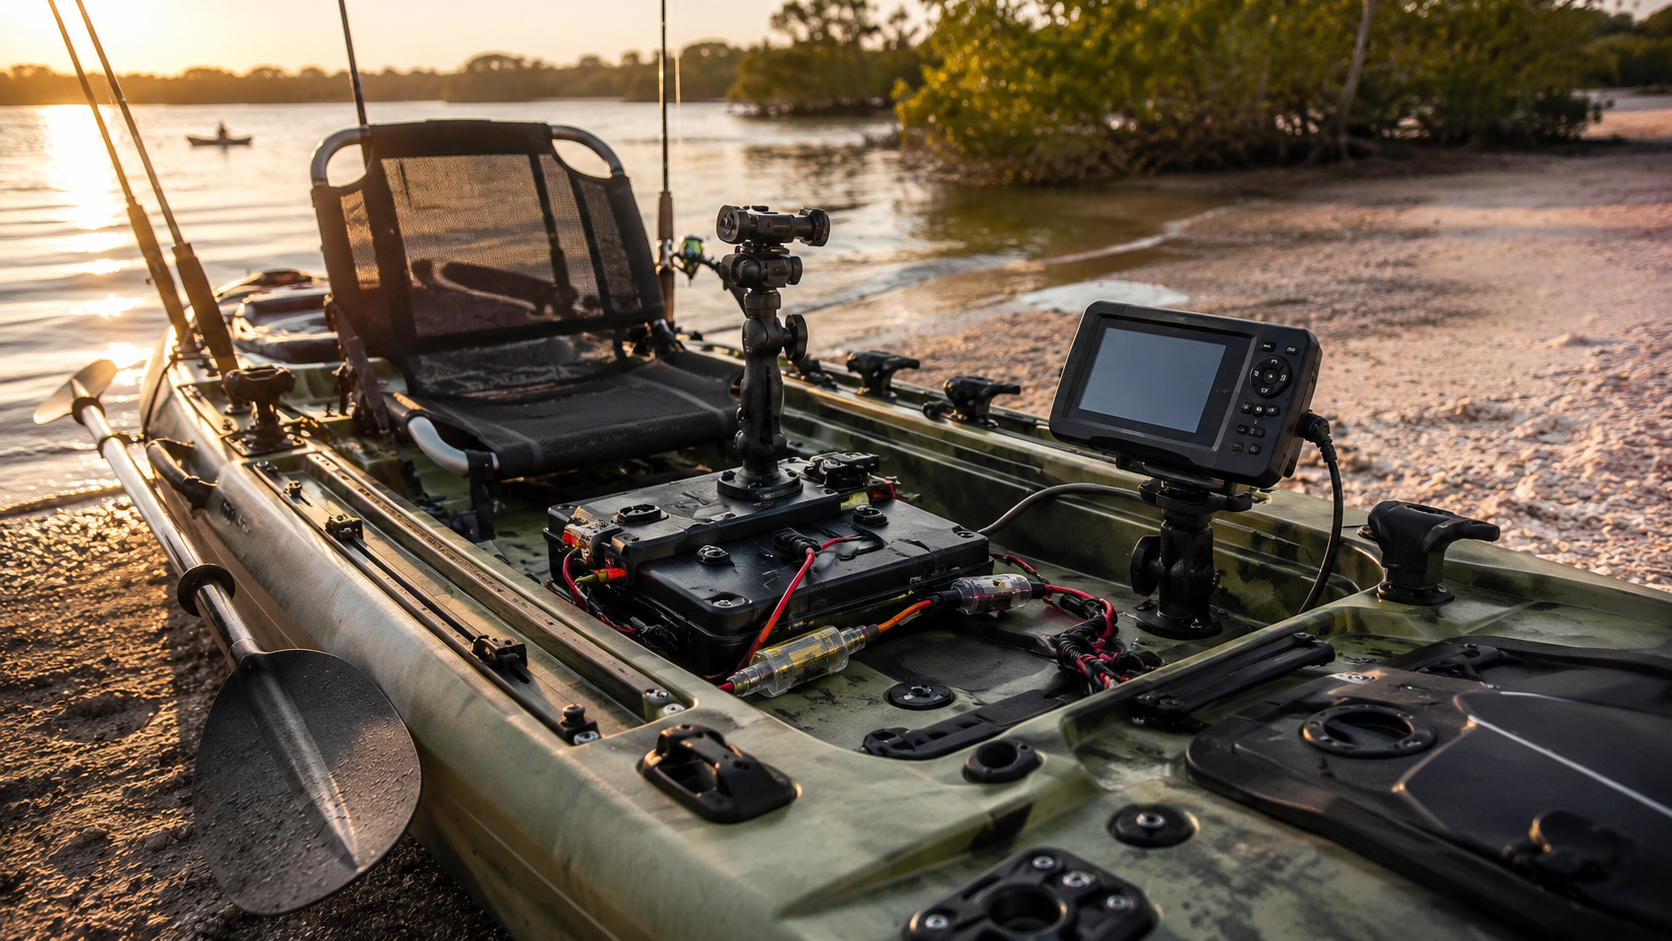
Plan the deck before you drill
A tidy kayak rig starts on paper, not with a hole saw. On Aussie Tackle Box we treat every fishing kayak as a small craft loadout: primary rod positions, sounder and transducer path, battery and switch panel, anchor trolley or stake-out, and dry storage for soft plastics and terminal tackle. Work in millimetres. Measure seat travel, paddle clearance and where your knees land when you stand to cast for flathead or mulloway in the estuary. Mark centreline and gunwale heights with a soft pencil, then dry-fit tracks and mounts with tape before any permanent fixings.
Sydney anglers often mix harbour kingfish sessions with river bream and tailor runs, so leave spare rail length for a second rod holder or a camera mount. Keep mass low and centred. Heavy batteries and large tackle crates forward of the seat make the bow dive in chop; shift weight toward the midships zone and confirm freeboard with your usual gear load in kilograms, not a half-empty hull.
Tracks, bases and rod holder layout
Gear tracks along the gunwales give you adjustable mounts without a forest of fixed bases. Choose corrosion-resistant track suited to salt and rinse it after every session. Space track sections so a rod holder can slide clear of the paddle arc and still reach when you are hooked up. For most recreational setups:
- One primary holder within easy reach of the seated casting hand for soft plastics and light hardbodies.
- A secondary holder angled aft for a bait rod or heavier stick when you swap to live baits for mulloway.
- A short accessory rail near the console or hatch for pliers, GPS puck or light bar.
Through-bolt where the manual allows, with large washers or backing plates on thin plastic. Use marine-grade sealant on every penetration. If you also carry a small selection of shore rods in the vehicle, match holder internal diameter to the butts you actually fish—selection tips for blanks and actions sit naturally beside deck layout in our fishing rods selection, specs and comparisons notes.
Power, wiring and switch discipline
Sounders, lights and phones need a simple, fused DC system. A sealed 12 V deep-cycle or LiFePO4 pack in a vented, strapped battery box is standard on Aussie kayaks. Route positive and negative as a pair, supported every 150–200 mm, away from pedal drives and rudder cables. Fit an inline fuse close to the battery positive, then a clearly labelled master switch you can reach without standing in a swell.
Use tinned marine cable sized for the run length and load. Heat-shrink every crimp. Keep joins out of bilge water. A small bus bar under a splash cover beats a tangle of cigarette plugs. Label both ends of each run with heat-shrink markers so winter maintenance in the garage is quick. Rinse plugs with fresh water and a dab of dielectric grease after harbour sessions—Sydney salt finds every pin.
Sounder and transducer install
Mount the head unit where glare is manageable and the screen is readable while seated and when you briefly stand. A short RAM-style arm on track is easier to stow for transport than a fixed pod. Cable-tie a service loop behind the mount so the plug is not load-bearing when you fold the display down.
Transducer options on kayaks usually mean a scupper or through-hull style mount, a rear-mounted arm, or a shoot-through inside a water-filled or gelled pocket in a suitable hull zone. Follow the sounder maker’s minimum distance from strakes, scupper holes and metal fastenings. Aim the face level at rest with your normal trim and load. Avoid air gaps on shoot-through installs; trapped bubbles kill returns on bream-holding structure and bait schools.
Set basic range, sensitivity and colour palette on the water in known depth, then save a shallow estuary profile and a deeper harbour profile. That keeps you efficient when you move from flats flathead to deeper kingfish marks in one day.
Species-minded deck extras
Estuary days for bream, flathead and mangrove jack favour a low crate with labelled trays for hooks, leaders and soft plastics, plus a short gaff or gripper stowed flat. Harbour and coastal hops for tailor, kingfish and spanish mackerel need stronger leaders ready on a spool caddy and a secure way to pin a second outfit. Freshwater trips toward murray cod country ask for heavier rods and a different net—confirm your holder angles before you leave the driveway.
Anchor trolley or stake-out pole mounts should not foul the paddle or rudder. Practice deploy and retrieve in calm water at your local ramp before you rely on them in current. Keep a compact safety kit: PFD worn, whistle, light, basic first aid, and a charged phone in a dry pouch. Check state fisheries rules and size limits for the waters you fish; bag and gear rules differ, and kayak anglers are still subject to the same regulations as any other recreational fisher.
Fit-out sequence that saves rework
- Map seat, foot braces and paddle path in millimetres; photograph the empty deck.
- Fit tracks and high-load bases; seal and torque; re-check seat travel.
- Install battery box, master switch, fuse and cable runs; test voltage at the far end.
- Mount sounder, route transducer, splash-test plugs, then verify depth on a known mark.
- Add rod holders, trolley hardware and crate straps; load full kit and trim-test on flat water.
- Rinse, inspect sealant, and log wire sizes and fuse ratings in a phone note for later service.
Care after salt sessions
Flush tracks, hinges and electrical plugs with fresh water. Crack open hatches so foam and carpet dry. Inspect sealant beads each month through the warmer season when you fish hardest, and again before the cooler months when gear sits longer between trips. Replace cracked mounts early—a failed holder in a wind against tide is how outfits go swimming.
For local advice on loadouts and seasonal patterns around Sydney, contact Aussie Tackle Box on +61275903570 or [email protected] during Mon–Fri: 09:00 – 17:00 (AEST). Bring your hull model and a photo of the deck if you want a second opinion on track length or sounder placement before you cut.

Navigation
See also
FAQ